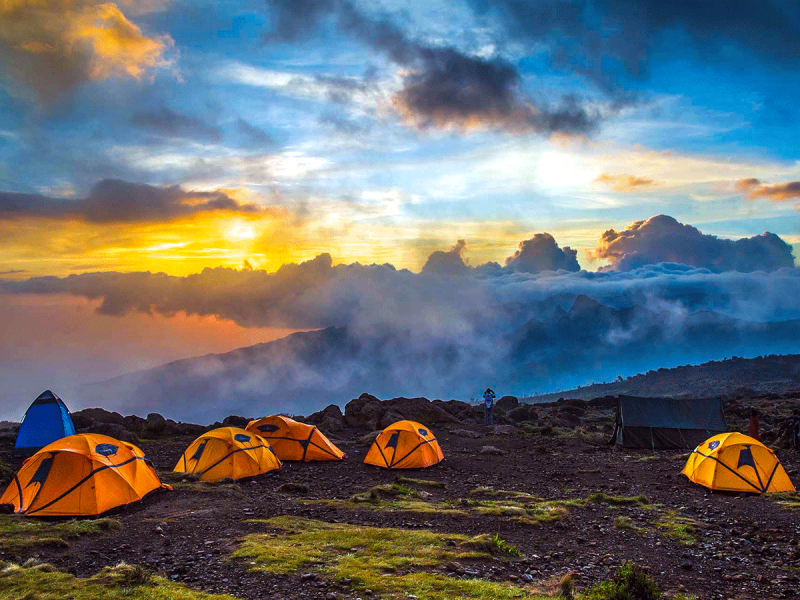
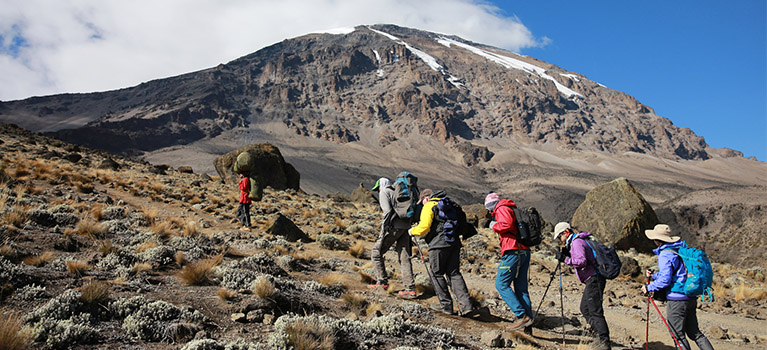
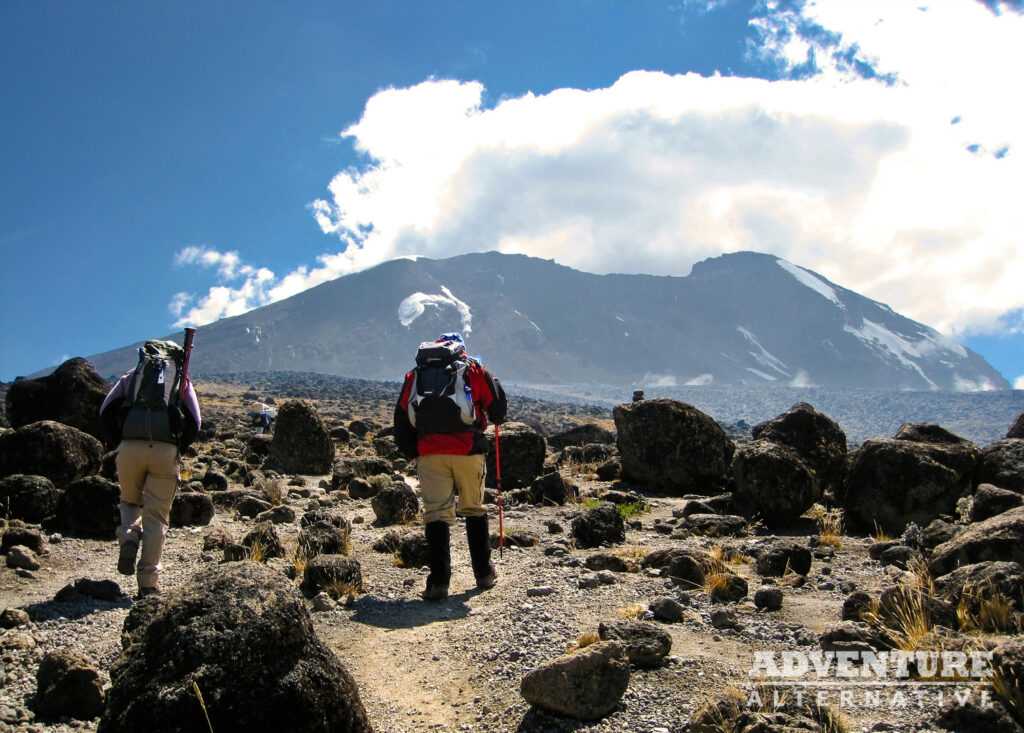
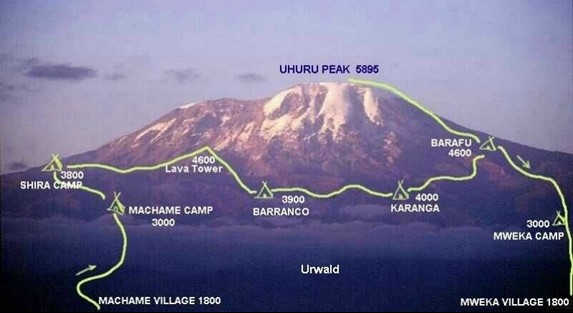
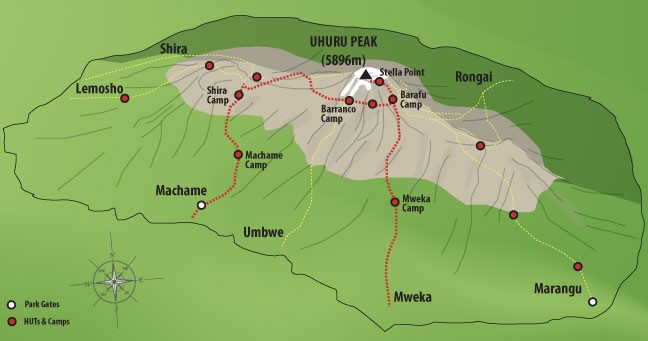
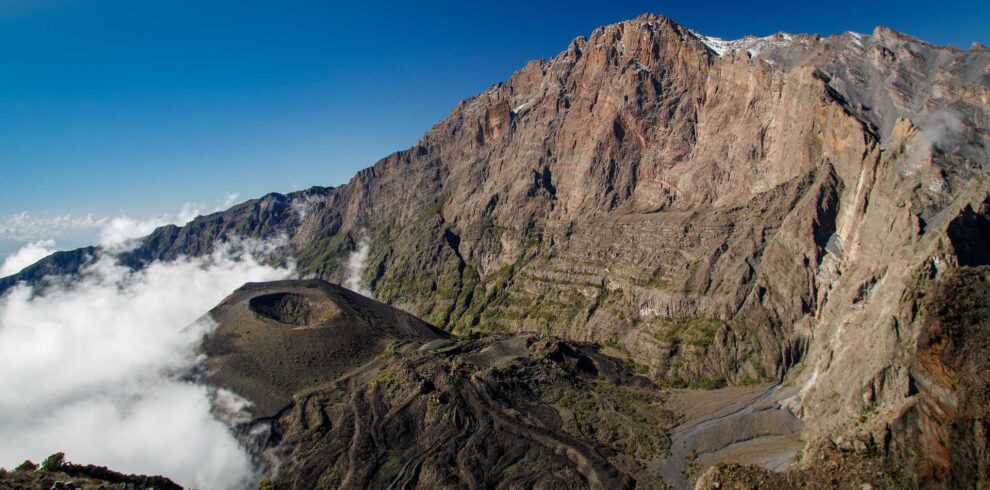
The Machame (Whiskey) Route is Kilimanjaro’s most popular camping route. It’s a rugged combination of routes that begins through the rainforest at Machame Village on the southwest side of the mountain, and over seven days, rises onto the edge of the Shira Plateau, down into the beautiful Great Barranco Valley, then circumvents the Kibo massif counter-clockwise through the alpine desert until reaching Barafu Camp. From here, the trek to the summit is done overnight to the crater rim on the steep scree slopes of the east-south-east facing Mweka Route.
7 Days Kilimanjaro Machame Route Overview
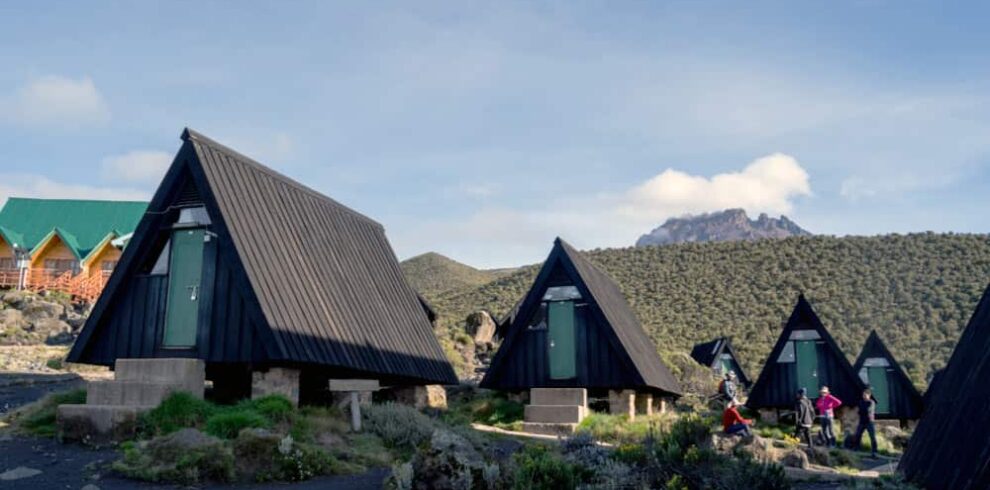
The trek winds through some beautiful scenery, which changes quite dramatically every day. This route requires mental and physical toughness, due to the high altitude and short amount of time to rest before the overnight summit attempt. There are no huts on this route; the accommodation is in mountain tents and dining is in our dining tents.
Itinerary
Depart Arusha/Moshi at approximately 09:00 for Machame Gate, about a 1.5-hour drive. After completing entry formalities, you will start walking through the mist on a 4 x 4 track for about an hour through the forest. The trail ends, and the path continues up through the green, dripping forest. Hikers are likely to hear the many exotic birds in the canopy above, and many will even see black and white colobus monkeys and sykes monkeys as they walk on the forest floor. The trek is quite long (12 miles / 20 km), but not very steep, and it takes between 5 and 7 hours to reach the first camp. Machame camp is just above the forest area, in the heath area. When the weather is clear, Shira’s jagged ridge and the summit can be seen.
Wake up early with a steaming cup of tea or coffee served in your tent, then after breakfast start climbing the steep track through a savannah of tall grasses and giant heather and erica trees. The clouds should clear to give you a magnificent view of the western rift and the glaciers on top of which Uhuru Peak sits. You make your way through the large rocks as you enter the moorland area, marked by the bizarre lobelias and Senecio, and the volcanic rocks draped with lichen beards that protect the alpine wildflowers growing at their base. You will reach the camp after descending a small valley, crossing a stream, and then climbing the Shira Ridge, after about 4-5 hours of trekking.
Continue climbing steadily over long ridgelines in the high desert for about 4 hours, and break for lunch at about 14,500 ft (4,420 mt.). After lunch, continue to Lava Tower, a 300-foot-high volcanic plug that marks an exposed pass at 15,000 feet (4,600 m). In the afternoon we descend the steep trail into the Great Barranco Valley. Barranco camp is set on a pass (flat area) surrounded on three sides by the steep valley walls and the Kibo massif itself. Hanging glaciers glisten in the sunlight, amidst a strange landscape of plants such as giant ragwort (Senecio Kilimanjaro) and giant lobelia, a unique endemic plant. The trekking time is 6-7 hours.
The day starts with a climb up the steep ‘Barranco Wall‘, followed by a 3-4 hour walk and a stop in the Karanga Valley for a hot lunch. Distance: 5 km
•Hiking Time: 4-5 hours
•Habitat: Alpine Desert
After breakfast, we leave Barranco and continue on a steep ridge passing the Barranco Wall, to the Karanga Valley campsite. This is a short day meant for acclimatization.
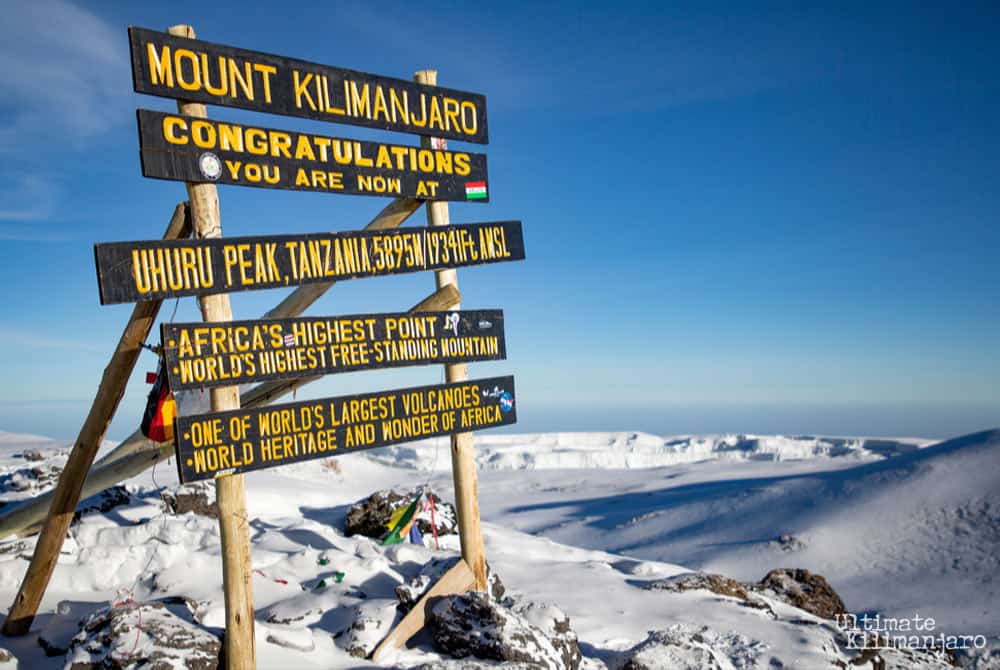
The hot, steaming drink will arrive early on this memorable day. A midnight wake-up call is the start of a real juggling act (12-17 hours of trekking). You start the trek between 12:30 and 1:00 am. Temperatures range from just below zero at midnight to -12 deg. F (-12 deg. C) to -10 F. (-23 deg. C) just before dawn at the summit. The winding trail with its endless twists and turns will take shape in the shadow of the Ratzel and Rebmann glaciers at dawn, and behind you, the spires of Mawenzi will appear in the red glow of the sun under the clouds. After about 6 hours of walking, you will reach the crater rim at Stella Point, at 19,000 feet (5,790 m), which is the end of the steep trail. From here it is a gentle slope upwards for about 1 hour to Uhuru Peak. After a short time at the top, descend the steep scree path to Barafu Camp for a rest, then regain your strength for another descent to Mweka Camp for the night.
Descend directly to the gate (2-3 hours), where you will have lunch and receive climbing certificates. On arrival at the gate, you will have lunch and then be transferred to Arusha. De-briefing of the climb. End of our services.
Marking The End Of Your 6 Days Kilimanjaro Climb Machame Route.
Elevation (ft): 10,000ft to 5,400ft
•Distance: 10 km
•Hiking Time: 3-4 hours
•Habitat: Rain Forest
After breakfast, we continue the descent down to the Mweka Park Gate to receive your summit certificates. At lower elevations, it can be wet and muddy. Gaiters and trekking poles will help. Shorts and t-shirts will probably be plenty to wear (keep rain gear and warmer clothing handy). From the gate, you continue another hour to Mweka Village. A vehicle will meet you at Mweka village to drive you back to hotel in Moshi.
Cost Includes
- Safety Equipment:
- Mobile phones – carried by the head guide and all assistant guides, for daily communications
- with our base in Arusha. For any emergency
- Stretcher (and convertible litter)
- Comprehensive medical/first aid kits
- MOUNTAIN CREW:
- Professional Mountain Guides, all head guides (at least 1 per trip) currently certified by NOLS
- USA as WFR (Wilderness First Responder)
- The ratio of at least one guide for every three guests, to ensure personalized attention.
- Cooks and Porters
- MOUNTAIN ENTRY FEES:
- Park Fees
- Campsite fees
- Emergency Rescue Fees
- CAMPING EQUIPMENT AND OTHER GEARS:
- 4-season Mountain sleeping tents (a triple tent used as a double or single (with supplement),
- each tent with a custom-made groundsheet covering both vestibules, to allow clean & dry
- storage of gear, and keeping water, mud, or dust from entering the tent.
- Foam Camping Mat
- Large weatherproof dining tent, at night the tent is lit with candlelight, This tent is used for
- breakfast, lunch, and dinner if the weather does not allow it.
- Aluminum dining tables and chairs, for all meals.
- MOUNTAIN MEALS
- *Three meals a day, we produce and prepare delicious and energizing meals necessary for high
- altitude mountain trekking.
- Snakes & bites
- Tea and coffee
- Mineral water
- TRANSPORT
- Transfer from the hotel to the starting point
- Transfer from the last point to the hotel
Cost Excludes
- Accommodation upon arrival and last day
- Tips for a mountain guide, recommended 15-20 per group per day
- Porters 5 – 10$ per porter per group per day
- Personal expenses
- Personal items
- Personal insurance/travel insurance
- Personal medicines/first aid kit
- Personal trekking gears
- Sleeping bag
When preparing for a Kilimanjaro climb, it’s important to have the appropriate gear. Your gear list should include layered clothing (including an insulated jacket and warm gloves), high-quality hiking boots, a 4-season sleeping bag, a headlamp, and a water bottle. However, these are just the basics. To better understand what gear you’ll need and why, please use the links below to navigate to each section of our Kilimanjaro kit checklist.
If you’re planning to hike Mount Kilimanjaro, it’s important to understand the different climatic zones you’ll encounter, which can range from warm and tropical at the base of the mountain to freezing on the summit. To ensure your comfort during the hike, it’s crucial to layer your clothing appropriately, allowing you to add or remove layers as the weather changes. Each layer should be made of wickable fabric that hugs your skin, with cotton being avoided as it doesn’t allow moisture to pass through.
Here are the layers of Kilimanjaro clothing you’ll need to bring with you:
1. Underwear: Bring 4-5 pairs of sports underwear for a trek lasting less than 8 days, and two pairs of sports bras for women. Brands like Jokey and Icebreaker are recommended.
2. Base Layers (Top and Bottom): You’ll need a lightweight base layer over your underwear as you approach the upper reaches of the mountain. Smartwool or Icebreaker Base Layers made from 100% Merino wool are recommended, and Patagonia Capilene base layers are great synthetic alternatives for those allergic to wool. For treks lasting less than 8 days, one pair of top and bottom base layers should be sufficient, while for treks lasting over 8 days, you’ll need at least 2 pairs.
3. Hiking Shirts: Bring 4 short-sleeved shirts and 2 long-sleeved shirts made of breathable, lightweight, and quick-drying polyester, merino, or nylon. Avoid cotton. Brands like Icebreaker, Craghoppers, Columbia, and Patagonia are recommended.
4. Hiking Trousers/Pants: Bring 1-2 pairs of hiking trousers, with an additional pair ideal for treks lasting more than 7 days. Bring 1 pair of trekking shorts if preferred. Brands like Columbia, Kuhl, Fjallraven, or Craghoppers are recommended.
5. Fleece Insulation Layer: Bring one mid-weight fleece jacket or parka top for colder stretches on the hike and summit night. Polartec fleeces in 200s provide great warmth and comfort. Brands like North Face, Helly Hansen, and Patagonia are recommended.
6. Core Insulated Jacket or Third Layer: This is a critical piece of kit for Kilimanjaro, keeping your core extra warm on summit night. Choose an insulated jacket based on its weight and warmth, with down providing the greatest weight-to-warmth ratio. Brands like Columbia, Marmot, The North Face or Arc’teryx are recommended.
Kilimanjaro boots and footwear are crucial for a successful mountain climb. In this article, we’ll provide guidelines on the key features to look for in a pair of boots and recommend some affordable options.
Remember that your feet are what will help you reach the top and come back down safely, so it’s important to follow the tips in this article to avoid sore feet, blisters, and lost toenails. Check out our guide to hiking Mt Kilimanjaro and download our Kilimanjaro equipment list for more information.
When looking for trekking boots, there are three main features to consider: fit, quality, and use. A wrong decision on any of these could result in foot injuries, back pain, lost toenails, and blisters.
Fit is the first characteristic to look for. To test the fit of a boot, put your foot in the boot and slide it forward until your toes reach the front of the boot (make sure you’re wearing an average cushioned sports sock). Then, take your index finger and slide it down the back of the boot between your heel and the boot support.
A well-fitting boot should allow you to insert your finger without too much resistance. If you can’t insert your index finger, the boot is too small, while if your finger fits too easily, the boot is too big. A snug fit, with your index finger in the back of the boot, is the right fit.
Quality doesn’t have to be expensive, and you can find affordable trekking boots that are of great quality. The following features define good quality boots:
– Medium to high tops for sturdy ankle support. The higher the top, the heavier the boot.
– The sole of the boot should have a high rubber content and deep lugs for better traction. The deeper the lugs, the heavier the boot.
– Medium to heavy weight. Heavy boots are durable and cushioned, but they can be tiring to hike in. We recommend medium-weight boots.
– Waterproof. This is standard today, and Gore-Tex material is recommended for improved waterproofing. Combined with waterproof socks, you can keep your feet dry.
– The lacing system should incorporate D-Strings and speed hooks for better ankle support and fast lacing.
Once you have a good-fitting pair of boots with similar characteristics, it’s essential to break them in. Never arrive at Kilimanjaro with brand-new boots that you’ve never worn. Wear your boots as often as possible before your hiking date and undertake 2-3 long-distance treks (4-5 hours a day) to break them in.
Tanzania has three major international airports:
- Dar es Salaam (DAR)
- Zanzibar (ZNZ)
- Kilimanjaro Airport (JRO)
The latter is the most convenient for Kilimanjaro, sitting only 42 km away from the mountain town of Moshi and 50 km from Arusha. In addition to flights to Tanzania, you may consider flights to Nairobi in Kenya, which is only a 5-hour shuttle bus ride to Arusha or a 1-hour plane ride to JRO. Note, however, that by choosing to fly to Kenya you may need a multiple-entry Kenya visa (if you are flying out of Kenya, too, for example, and spend longer than a fortnight in Tanzania), which can cost as much as $122 – thereby reducing or eliminating any saving you may have made in airfares.
In deciding which flights to book, you should take the full trip into consideration. For example, if you would like to spend a couple of days in Zanzibar after the climb, it might be best to book one-way tickets from your home to Kilimanjaro Airport for the climb, from Arusha to Zanzibar after the climb, and then from Zanzibar back to your home.

